Credit, debit and refund notes from Zoho
Audience: Shop owner, staff who issue invoices Time: 2 minutes per note
When an invoice that LHDN already validated needs to change, you do not edit the invoice. You issue a note against it in Zoho and submit that note from the envoice widget, the same way you submitted the invoice. Each note gets its own UUID and refers back to the original invoice.
| Situation | Issue |
|---|---|
| The buyer pays less (return, discount, overcharge) | Credit note (02) |
| The buyer pays more (extra charge, undercharge) | Debit note (03) |
| You gave money back to the buyer | Refund note (04) |
| The invoice is wrong and it is still within 72 hours | Cancel it instead: Cancel a Zoho invoice on MyInvois |
Credit notes
- In Zoho Books, open the validated invoice and create a credit note for it, or go to Sales > Credit Notes > + New. Enter the lines and amounts being credited and save it.
- Apply the credit note to the original invoice in Zoho (Apply to Invoices). That link is how envoice knows which validated invoice the note refers to.
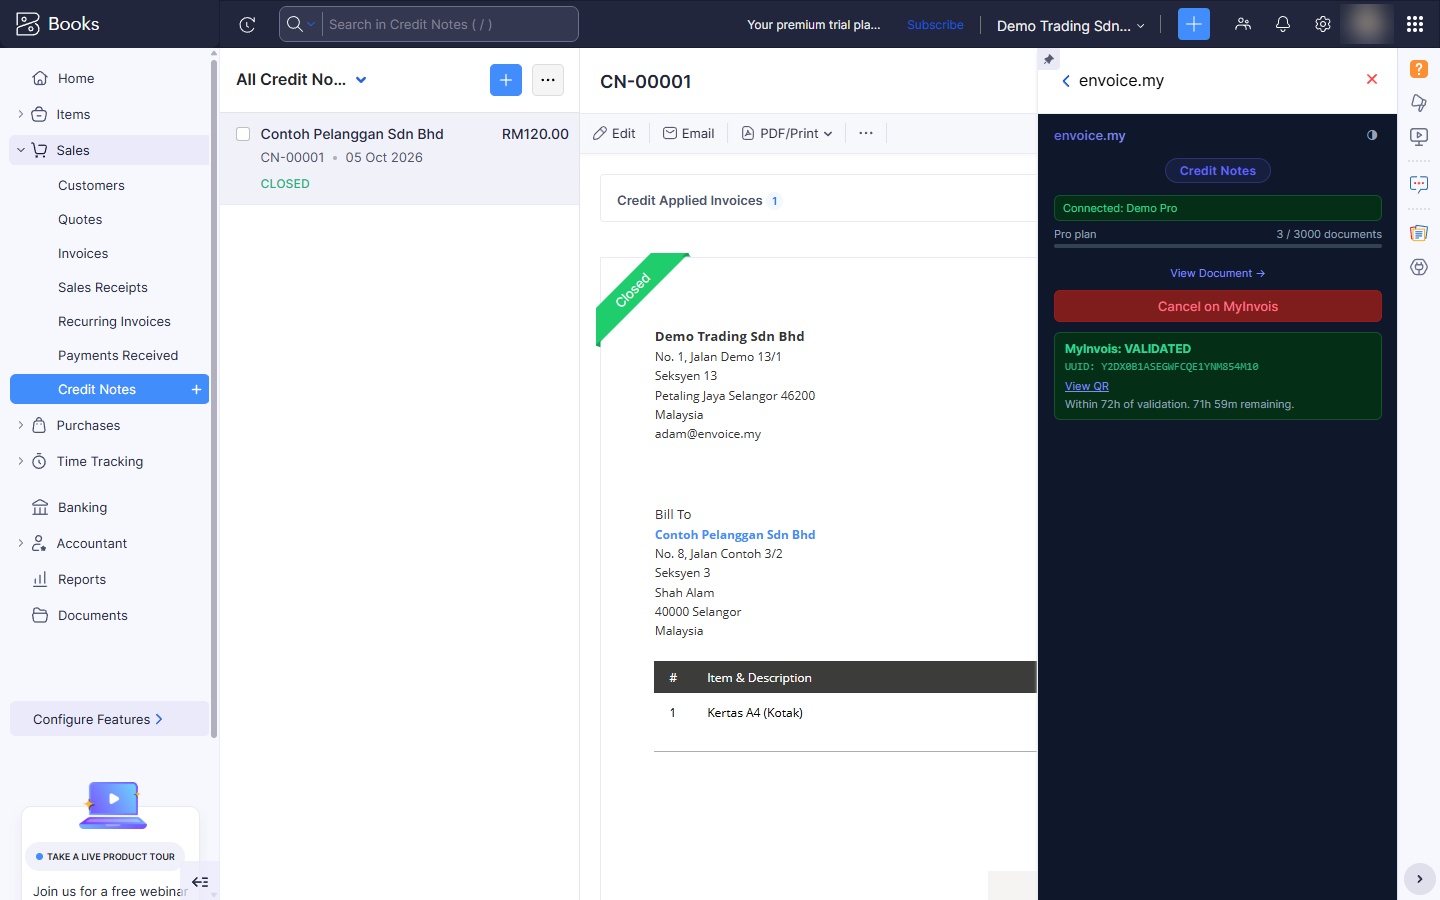
- Open the credit note and the envoice.my widget. The widget title shows Credit Notes. Read the pre-submit check, then click Submit to MyInvois.
When LHDN accepts it, the widget shows MyInvois: VALIDATED with the credit note's own UUID, View QR and the 72-hour cancel window.
Debit notes
- If you do not see debit notes in Zoho, switch them on: Settings > Setup & Configurations > General, tick Debit Note under the modules list, and Save.
- Create the debit note against the original invoice, which Zoho shows as the Associated Invoice. Zoho numbers debit notes
CDN-000001and lists them with your invoices. Add the extra charge as a description line and save it as sent. - Open the debit note and the widget. The pre-submit check confirms the Associated invoice number. Click Submit to MyInvois.
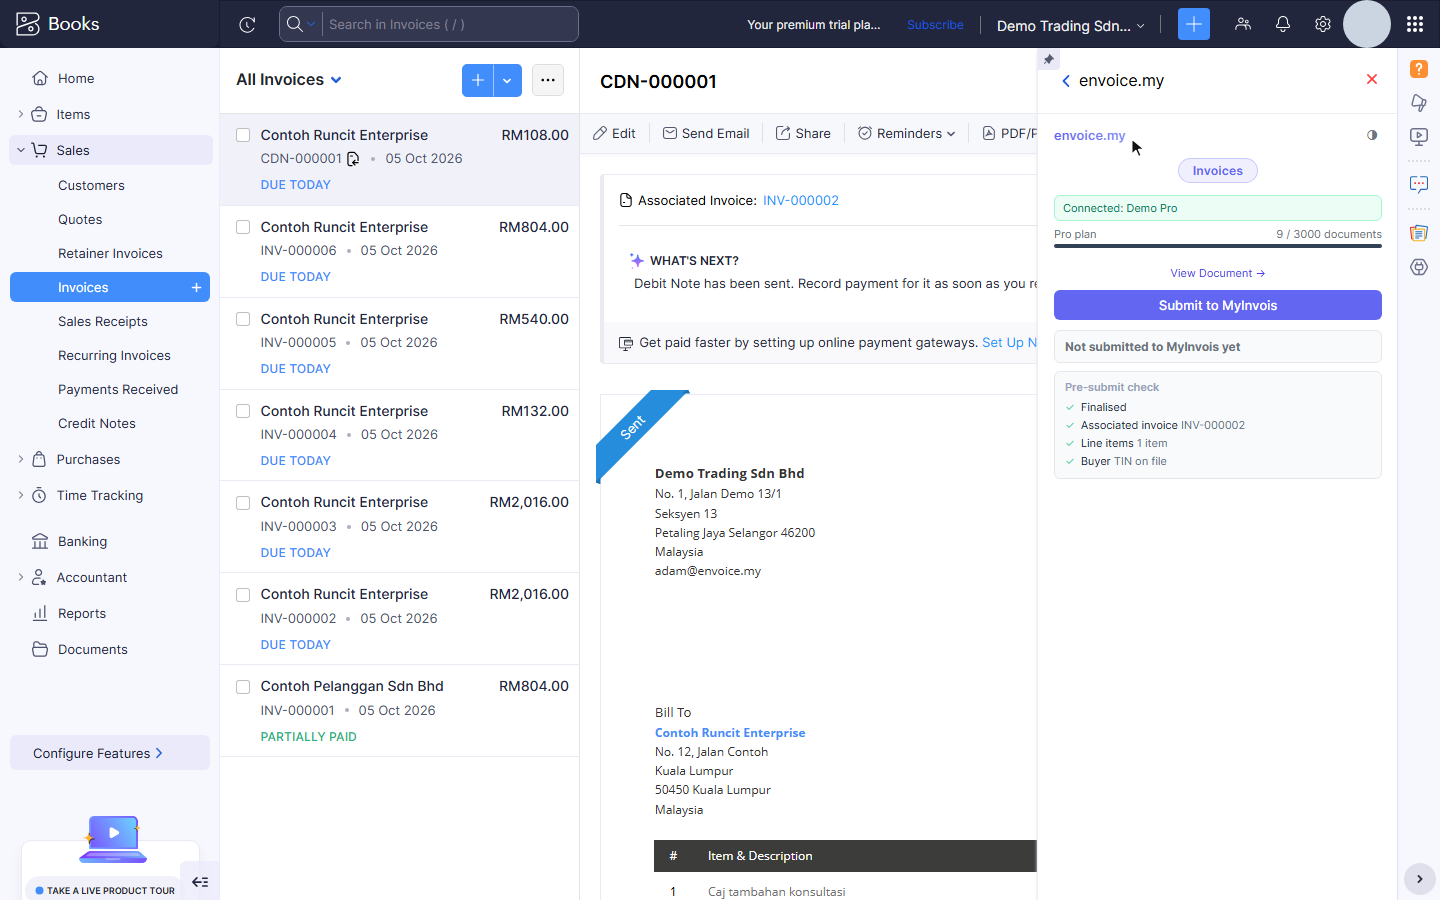
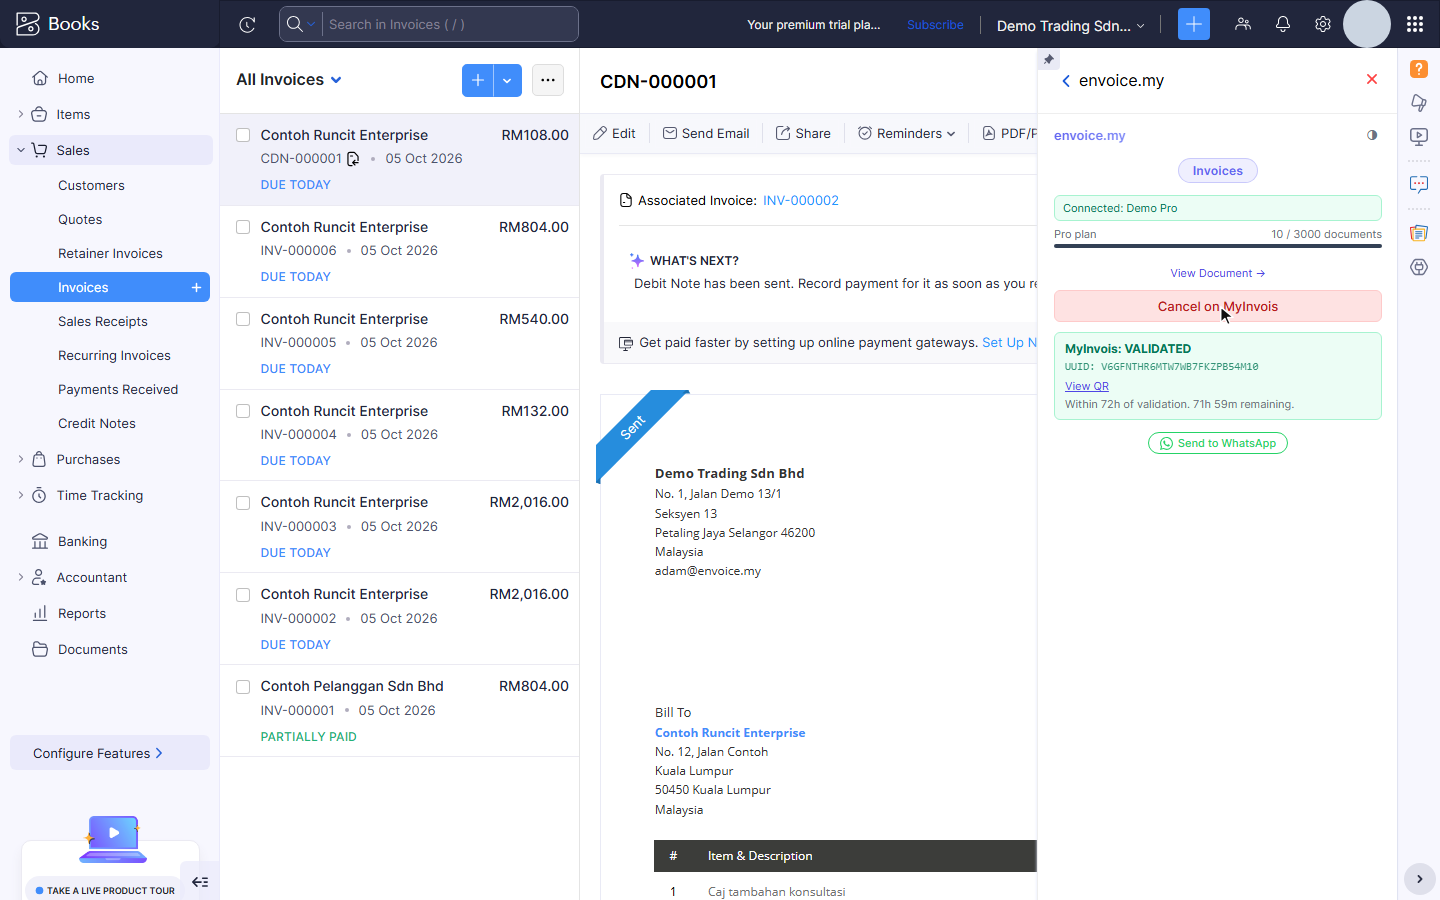
It files as a debit note (document type 03) that refers to the original invoice. When LHDN accepts it, the widget shows MyInvois: VALIDATED and Send to WhatsApp.
Refund notes
Use a refund note when money actually went back to the buyer.
- Create a credit note for the amount refunded, as above.
- On the credit note, record the Refund in Zoho. In the refund's Reference#, enter the original invoice number, for example
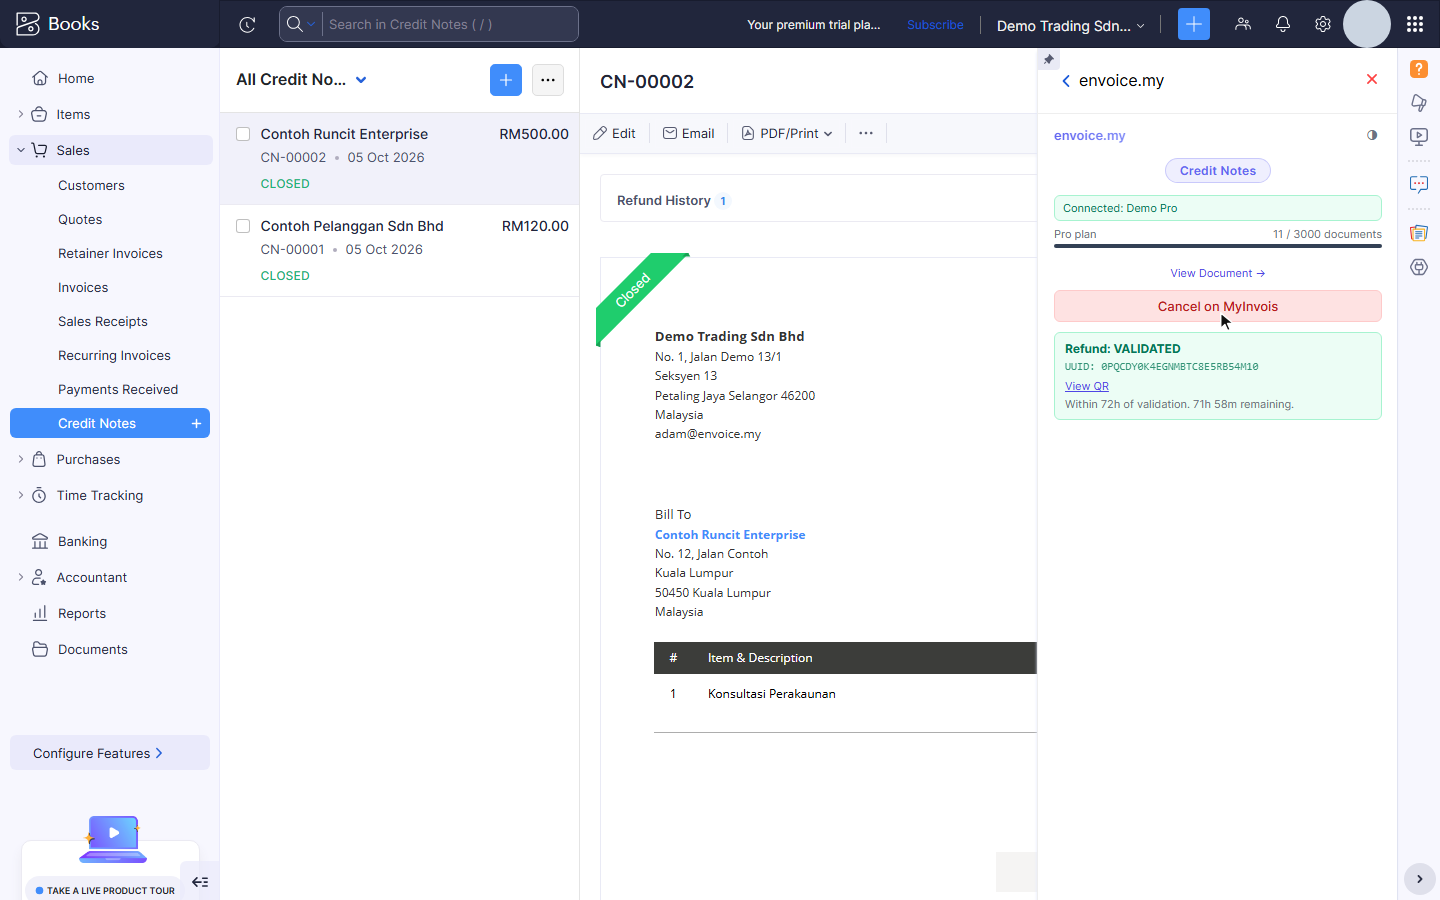
INV-000002. That invoice must already be validated on MyInvois. - Open the credit note and the widget. Because a refund is recorded, the widget offers Submit Refund to MyInvois instead of the normal submit, and the pre-submit check shows Refund reference with the invoice number.
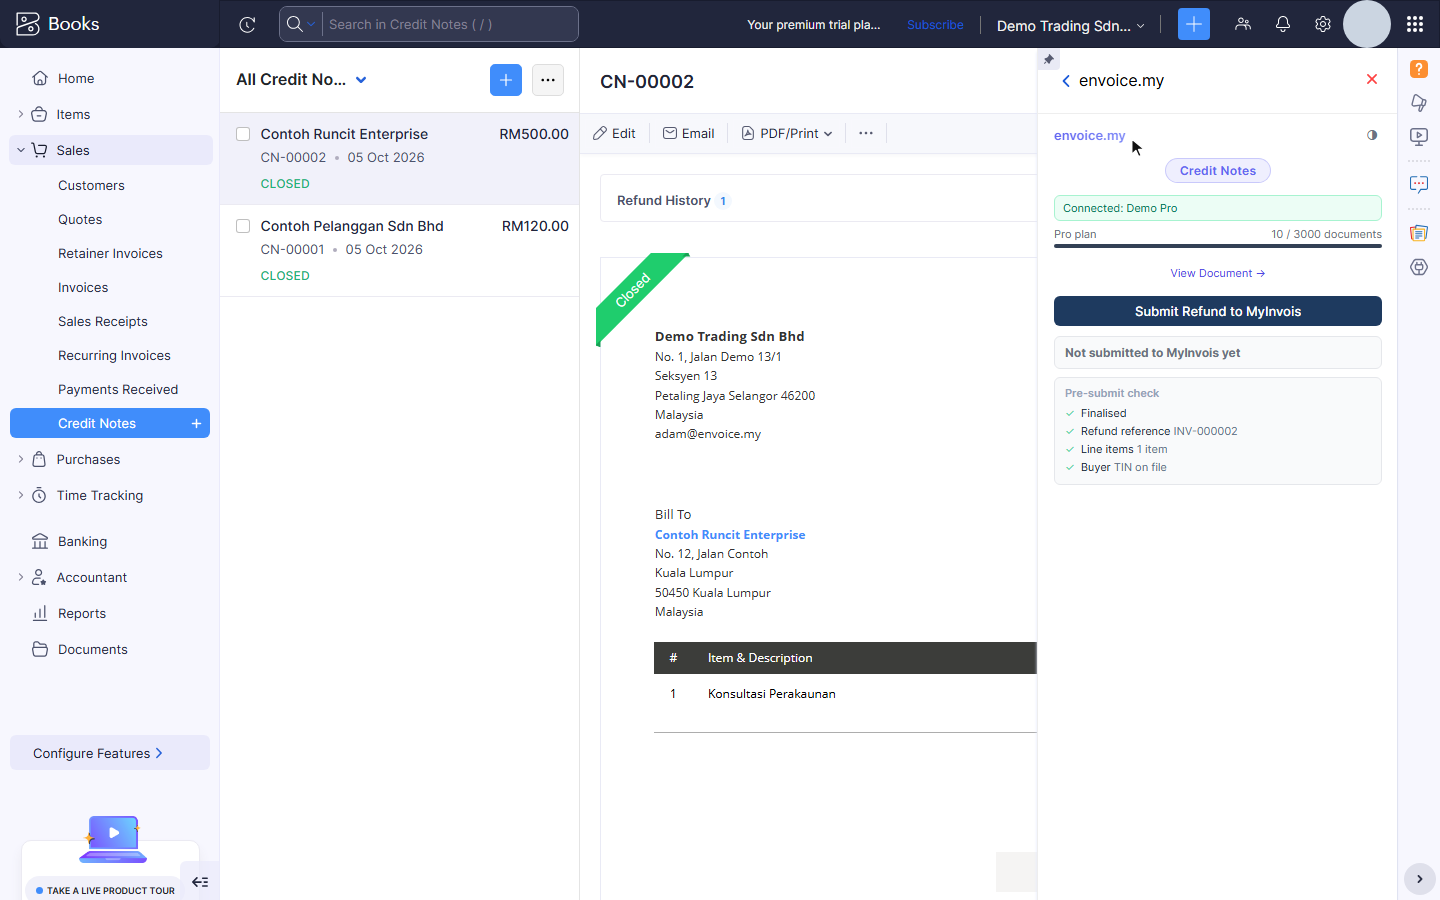
Click Submit Refund to MyInvois. It files as a refund note (document type 04) that refers to the original invoice. The widget shows Refund: VALIDATED with its UUID.
A credit note is filed either as a credit note or as a refund note, never both. envoice picks the right one from what is recorded in Zoho.
Self-billed notes
Self-billed credit and refund notes go through Vendor Credits instead: see Self-billed invoices from Zoho.
Related