If you use Zoho Books, connect it to envoice so you can submit your Zoho documents to LHDN MyInvois directly from inside Zoho, with no re-entry. Using Zoho Invoice instead? See Connect Zoho Invoice to envoice.
1. Open the envoice widget in Zoho
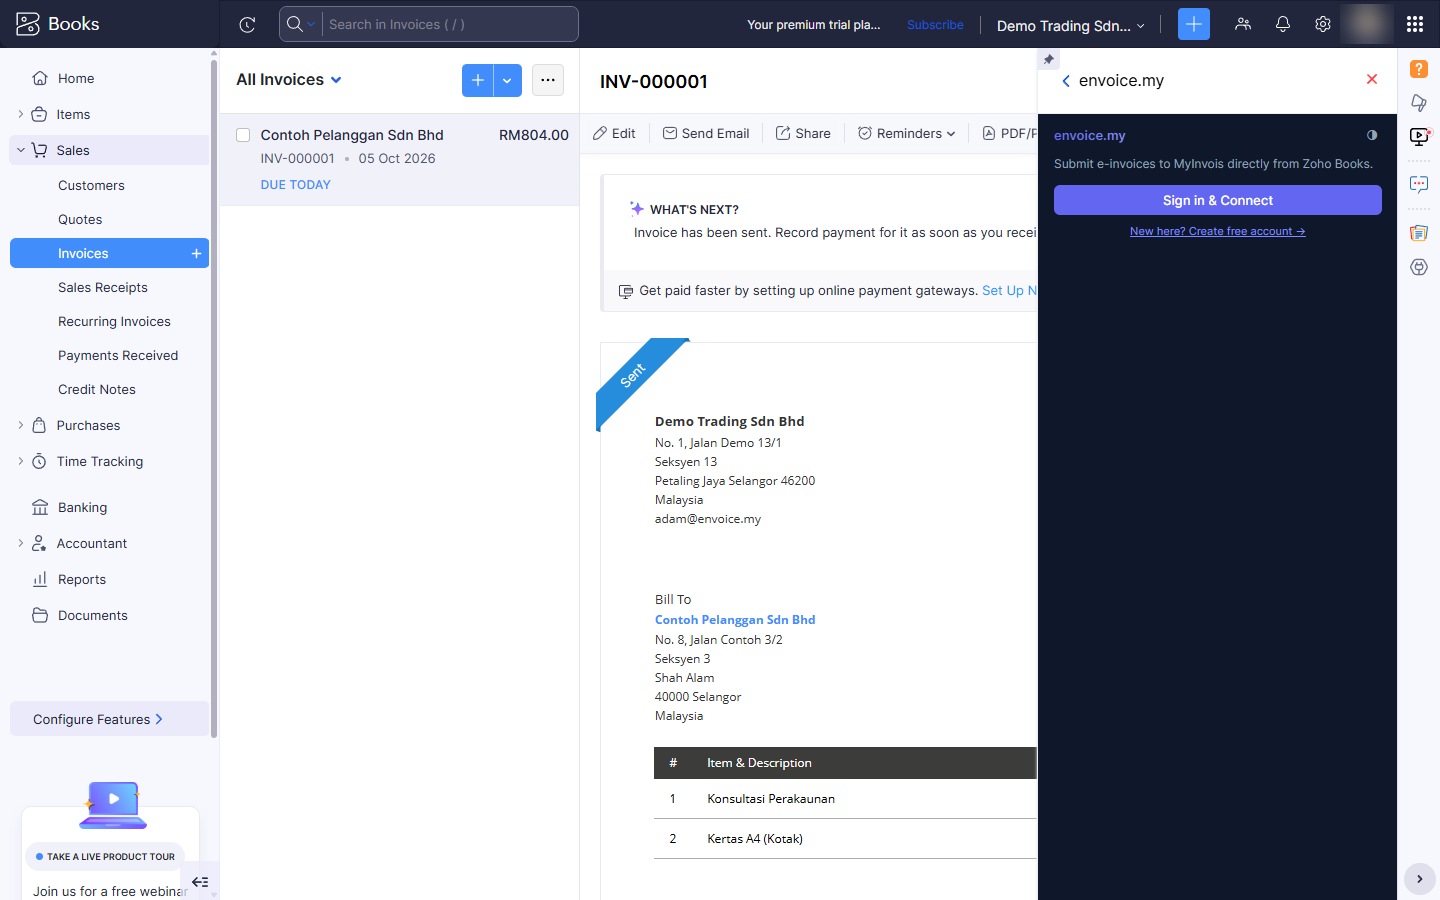
In Zoho Books, open any invoice, credit note or debit note. In the right sidebar, open the envoice.my widget and click Sign in & Connect.
 Open full-size screenshot (new tab)
New to envoice? Click New here? Create free account: the widget walks you through it.
2. Sign in to envoice
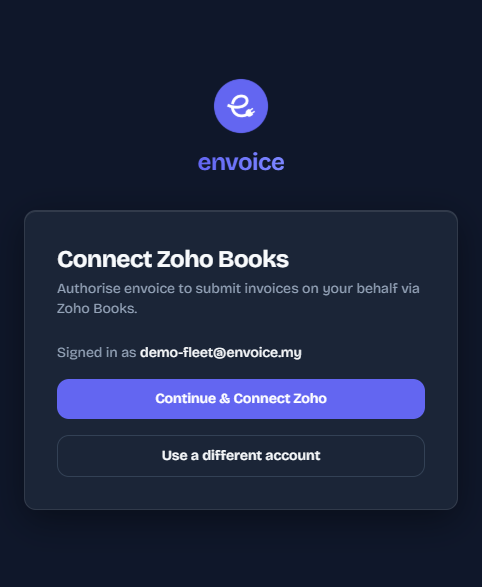
A popup opens on envoice.my.
- If you are already signed in to envoice in this browser, it shows Signed in as with your email. Click Continue & Connect Zoho, or Use a different account to sign in as someone else.
- If you are not signed in, sign in with Zoho, Google, GitHub, or your email and password. If you just created your account, you are signed in already.
 Open full-size screenshot (new tab)
envoice asks only to read the documents you submit and to write the MyInvois result (UUID, status, QR) back onto them.
3. Choose your shop (only if you have more than one)
If your envoice account has a single shop, it is linked automatically and you skip this step.
If you have several shops, pick the one to link to this Zoho organization, then click Connect Zoho Books. If you do not have a shop yet, use + Create new shop.
4. Connected
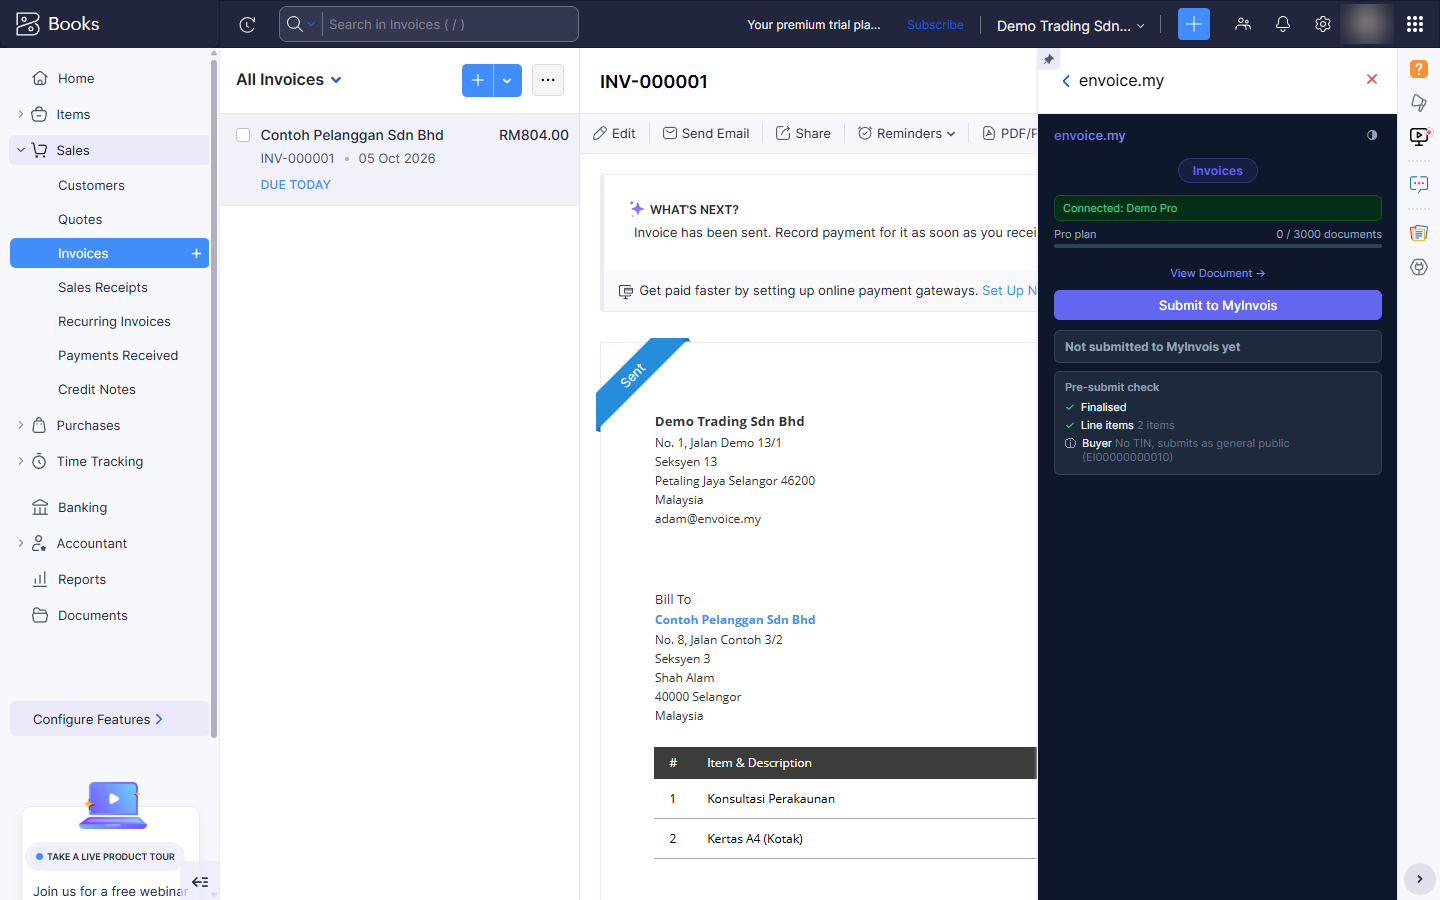
The popup closes and the widget shows Connected with your shop name, your plan and how many documents you have used this month. Under it you see Submit to MyInvois and a Pre-submit check for the document you have open.
 Open full-size screenshot (new tab)
You can now submit Zoho documents to MyInvois from the envoice sidebar widget. See Submit a Zoho invoice to MyInvois.
Re-connecting (Sign out, then Sign in & Connect again) is how you grant new permissions after an envoice update. Signing out keeps the connection, so you are not asked to approve again. Your existing data is preserved.
5. LHDN fields on your Zoho documents
When you connect, envoice adds a set of custom fields to your Zoho organization automatically. You do not have to create them. Most are filled by envoice; a few are optional inputs you can set when a document needs them.
Filled by envoice (on the document after submission): MyInvois UUID, QR Link, Status, and Doc Type. Credit, debit, and vendor credit notes get their own set so they do not inherit the invoice's UUID.
On your contacts (so the buyer is identified correctly): TIN, ID Type, ID Value, and SST Registration.
On your items (so each line is classified correctly): LHDN Classification, LHDN Tax Type, LHDN Tax Exemption Reason, LHDN Tariff Code, and LHDN Country of Origin. Set these on the item once and envoice picks them up on every line, even if Zoho does not copy them onto the transaction.
On the invoice (optional): LHDN Prepayment (an amount paid in advance) and LHDN Billing Start / LHDN Billing End (the billing period). Fill these only when they apply.
How to fill the contact and item fields: Set LHDN fields on Zoho contacts and items.
If envoice adds new fields in an update and you do not see them, open the envoice shop page and click Sync custom fields, or simply reconnect.
Self-billed bills and vendor credits
envoice can also submit self-billed invoices, credit notes and refund notes from Zoho bills and vendor credits. It only submits bills that Zoho itself marks as self-billed, so first switch on Zoho's self-billed modules (Self Billed Invoice, Self Billed Credit Note, Self Billed Debit Note) in Settings > Setup & Configurations > General. Regular bills are not submitted as self-billed. See Self-billed invoices from Zoho.
What you can do from Zoho
Each links to its guide.
Sales
- Submit an invoice
- Submit several invoices at once
- Submit a sales receipt
- Credit, debit and refund notes
- Deposits from retainer invoices
Purchases
Manage
- Cancel a submitted invoice
- Submission history
- Set LHDN fields on contacts and items
- Switch to envoice from another e-invoice app
Related