Start in the demo shop and go live
Audience: Shop owner (Admin) Time: 10 minutes, plus the time to get your MyInvois credentials
When you sign up, envoice gives you a demo shop straight away. It is a working shop with example business details, set to the internal test mock, so you can record test sales without anything reaching LHDN. When you are ready, you turn the same shop into your real business. You do not start again and nothing you set up is lost.
1. Explore the demo shop
After you sign in you land on the dashboard of a shop named after you with (Demo) at the end. The SANDBOX badge next to the shop name means documents go to the internal test mock, not to LHDN.
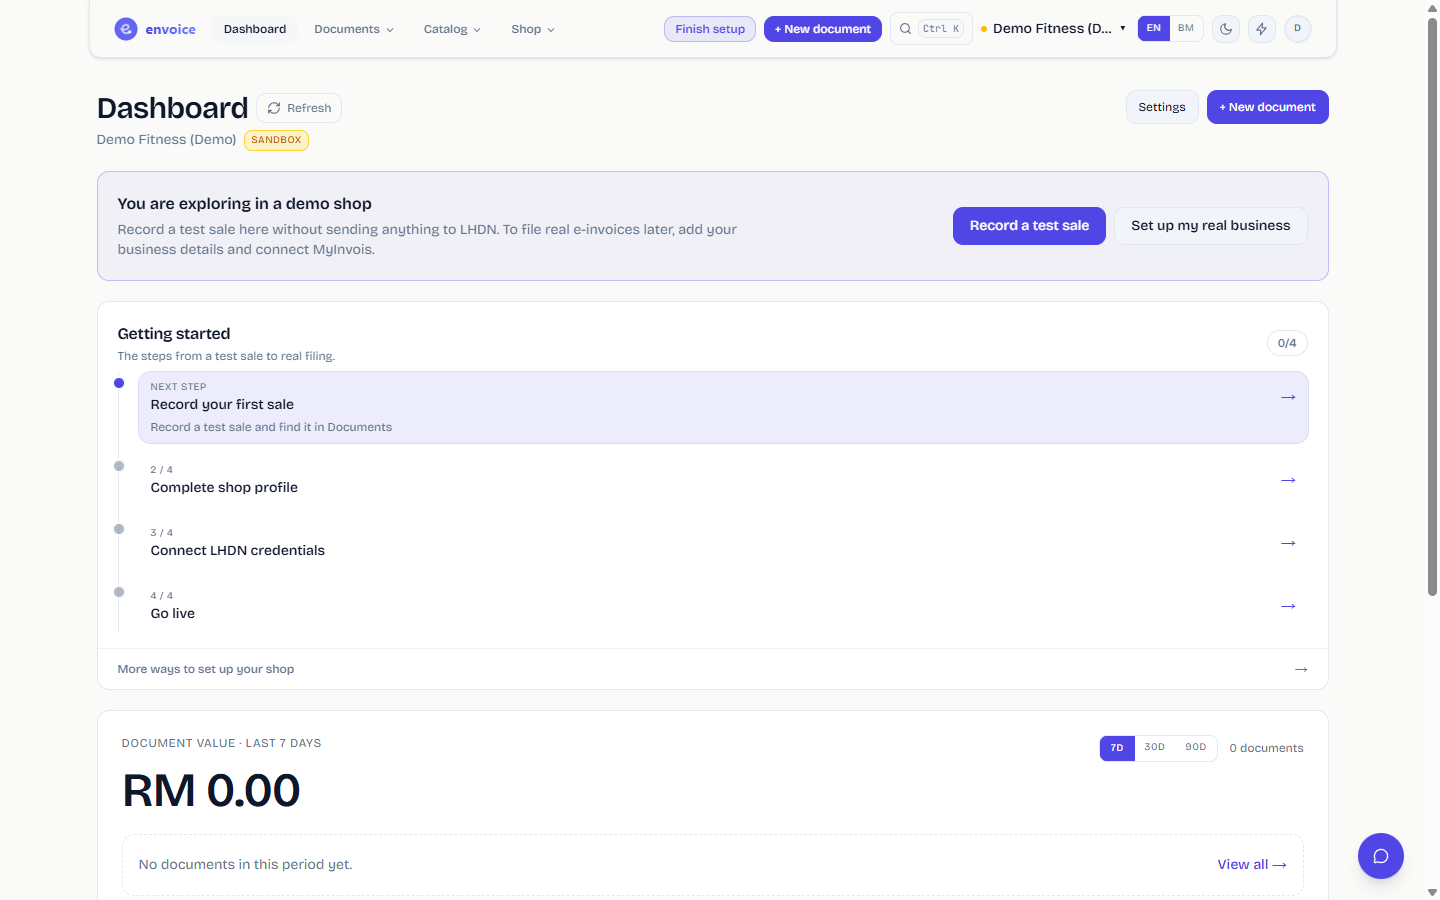
The Getting started card lists the four steps from a test sale to real filing:
- Record your first sale
- Complete shop profile
- Connect LHDN credentials
- Go live
Click Record a test sale to try the invoice form. The sale is filed to the internal test mock and shows up in Documents, exactly as a real one would. Test sales still count toward your plan usage.
2. Replace the example business details
Click Set up my real business (or open Settings > Profile). The banner Make this shop yours reminds you that the identity, address and phone below are only examples.
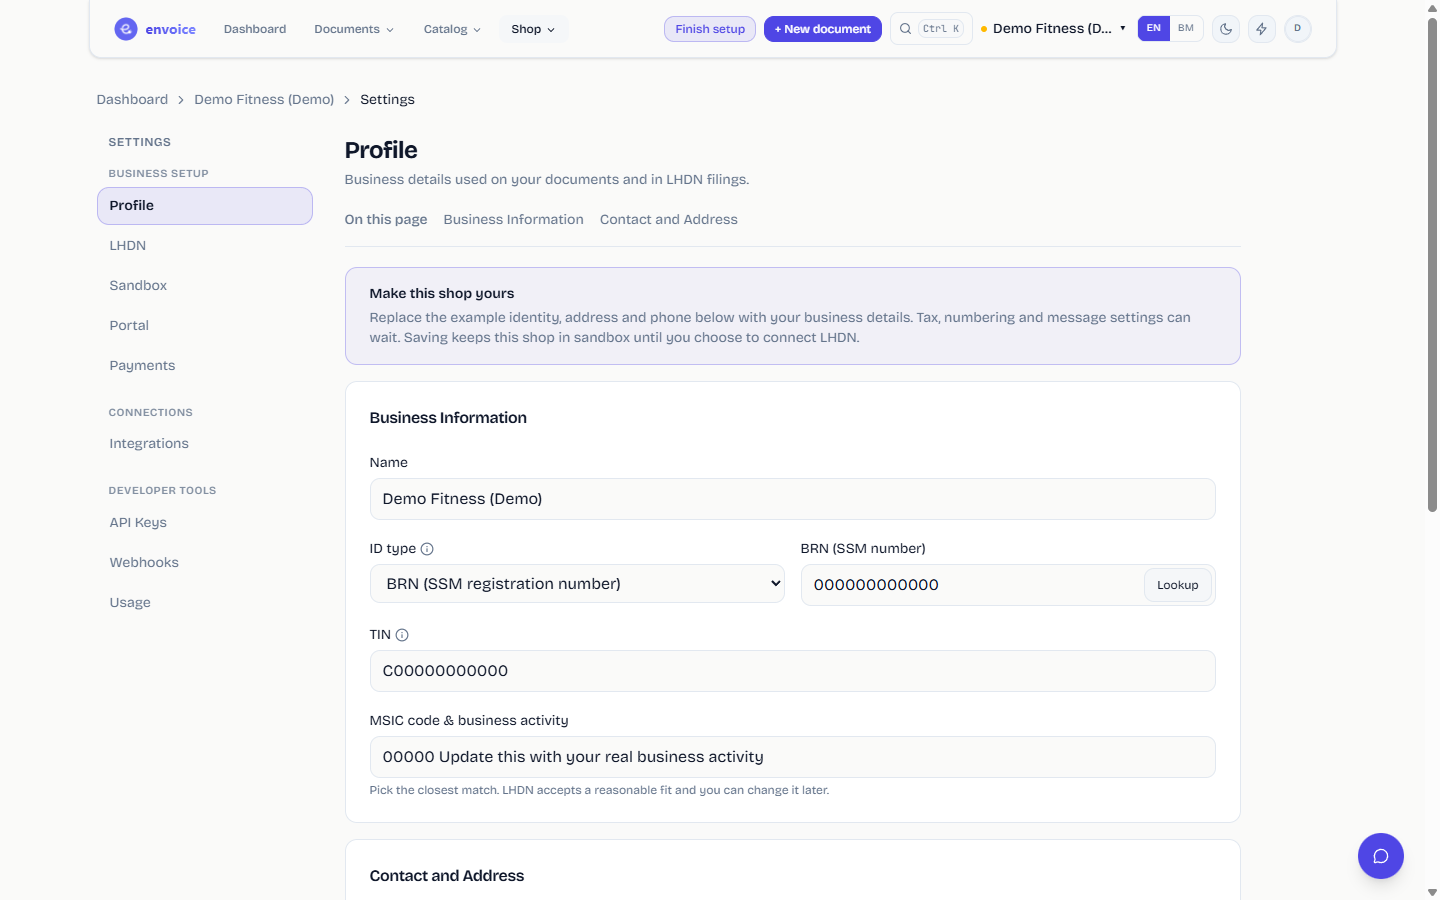
- Change Name to your business name.
- Choose the ID type (BRN for a company, NRIC for an individual), enter the number and click Lookup to fill your TIN.
- Pick your MSIC code & business activity.
- Fill in Address 1, City, State, Postcode, Email and Phone.
- Click Save business details.
Saving does not file anything and does not switch on live filing. The shop stays on the internal test mock. Tax registrations, numbering and the WhatsApp message are under More settings and can wait.
See Set up your shop for each field in detail.
3. Connect your MyInvois credentials
Open Settings > LHDN. While the shop is in sandbox you see the note that no LHDN credentials are needed yet.
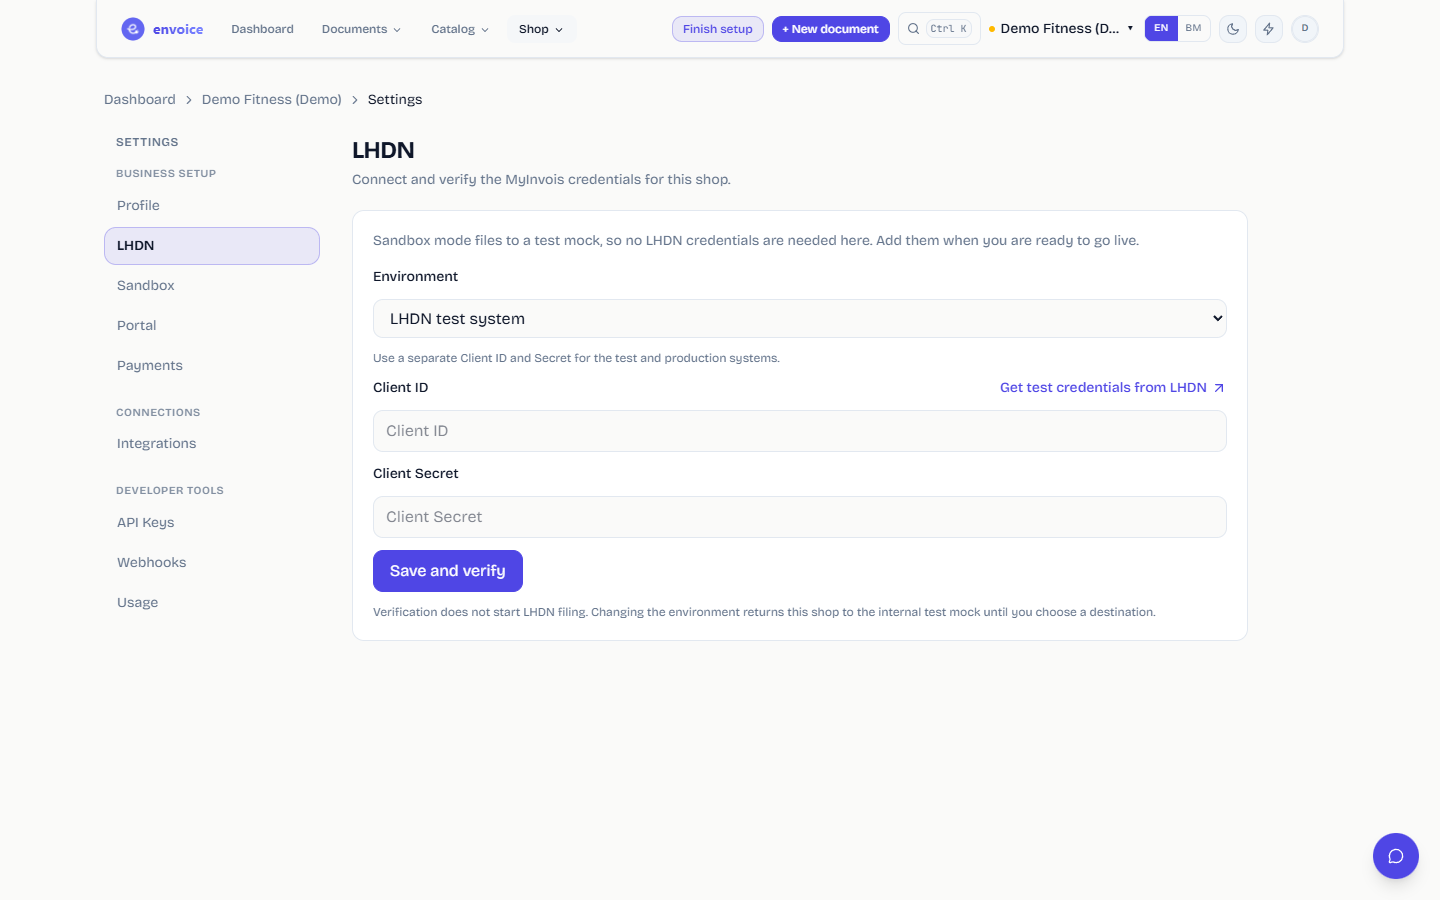
- Choose the Environment: LHDN test system or LHDN production system. Each one has its own Client ID and Secret.
- Paste the Client ID and Client Secret from MyInvois.
- Click Save and verify.
When the check passes, the status shows the date and time it was verified. Verifying does not start LHDN filing on its own. If you do not have credentials yet, follow Get your LHDN MyInvois credentials.
4. Choose where documents go (go live)
Open Settings > Sandbox. The top of the card shows the Current filing destination.
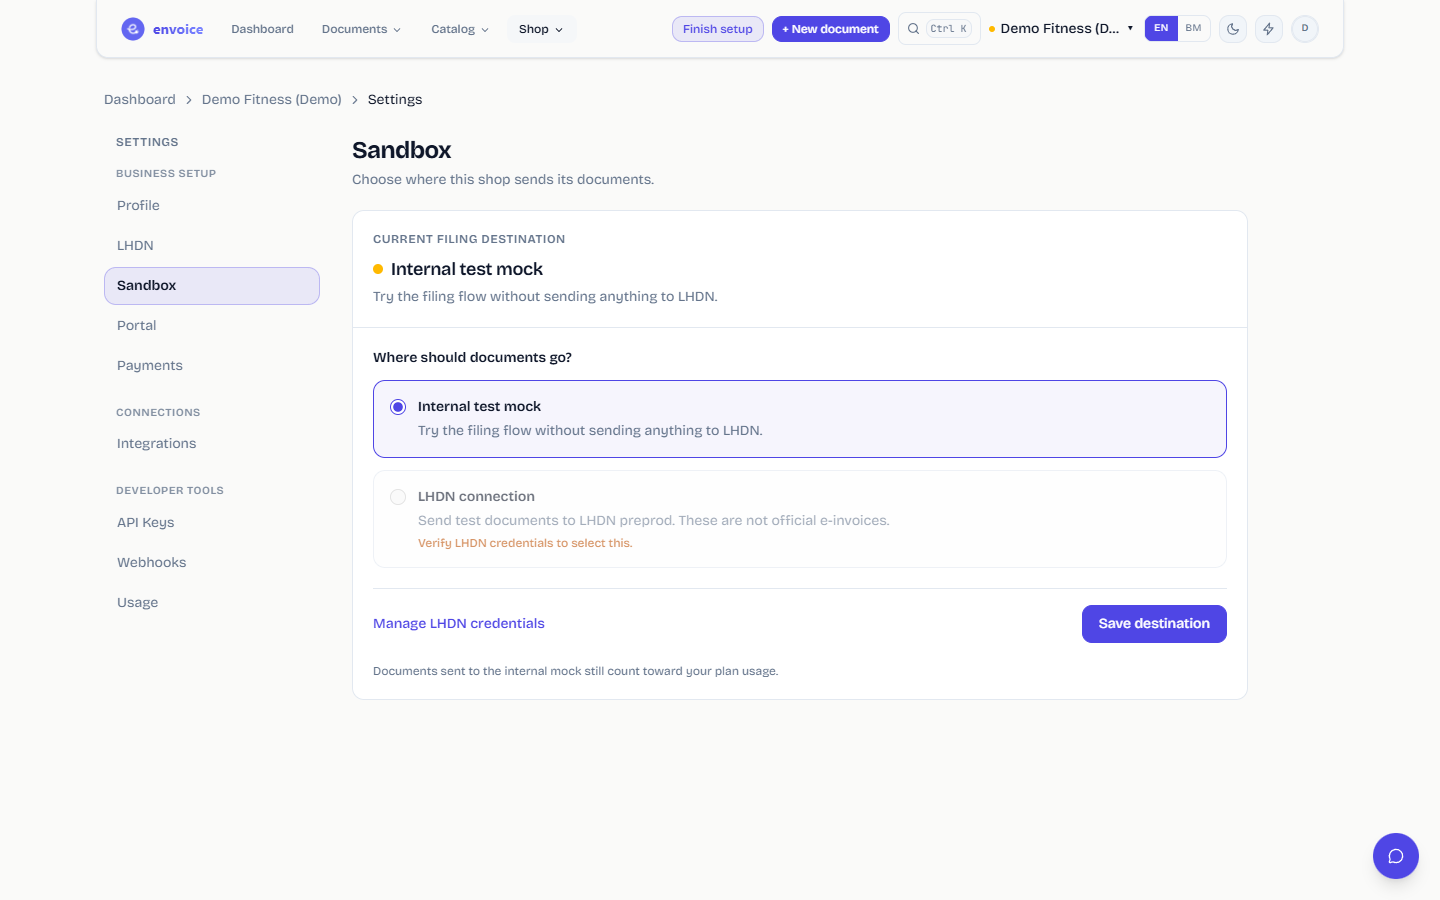
- Under Where should documents go? select LHDN connection. It stays greyed out until your credentials are verified.
- Tick the confirmation. For production it reads: "I understand future submissions will go to LHDN production as real e-invoices."
- Click Save destination.
From now on every document you submit goes to the LHDN system you verified. With production credentials these are real e-invoices. The demo label is gone and the shop is your real business.
envoice will not let a shop leave the test mock while the profile still has example details. If you see "Complete your real business identity in Profile before sending documents to LHDN", go back to step 2.